ESTUN Robot 3D vision inspection system, create complex and precise measurement solutions.
With the increasingly complex structure of current parts, traditional manual inspection has low efficiency and relies on multiple inspection tools, with low precision and ultimately no quantitative data or inspection reports for output.
The visual 3D inspection system developed by Hangding Intelligent, an ESTUN ecological chain enterprise, uses robots as the operating platform and is equipped with fully automatic measurement systems equipped with optical lenses. It utilizes machine vision and 3D measurement technology to perform high-precision inspections of various parts produced during industrial manufacturing processes, achieving fast-paced, highly reliable continuous operation. It is a key measurement device that is rigidly needed in high-end manufacturing industries. The Hangding visual 3D inspection system has a wide range of application prospects in various industries, can improve product quality and production efficiency, reduce labor costs and labor intensity, and promote the digital transformation of industrial manufacturing.
Robot 3D vision inspection system
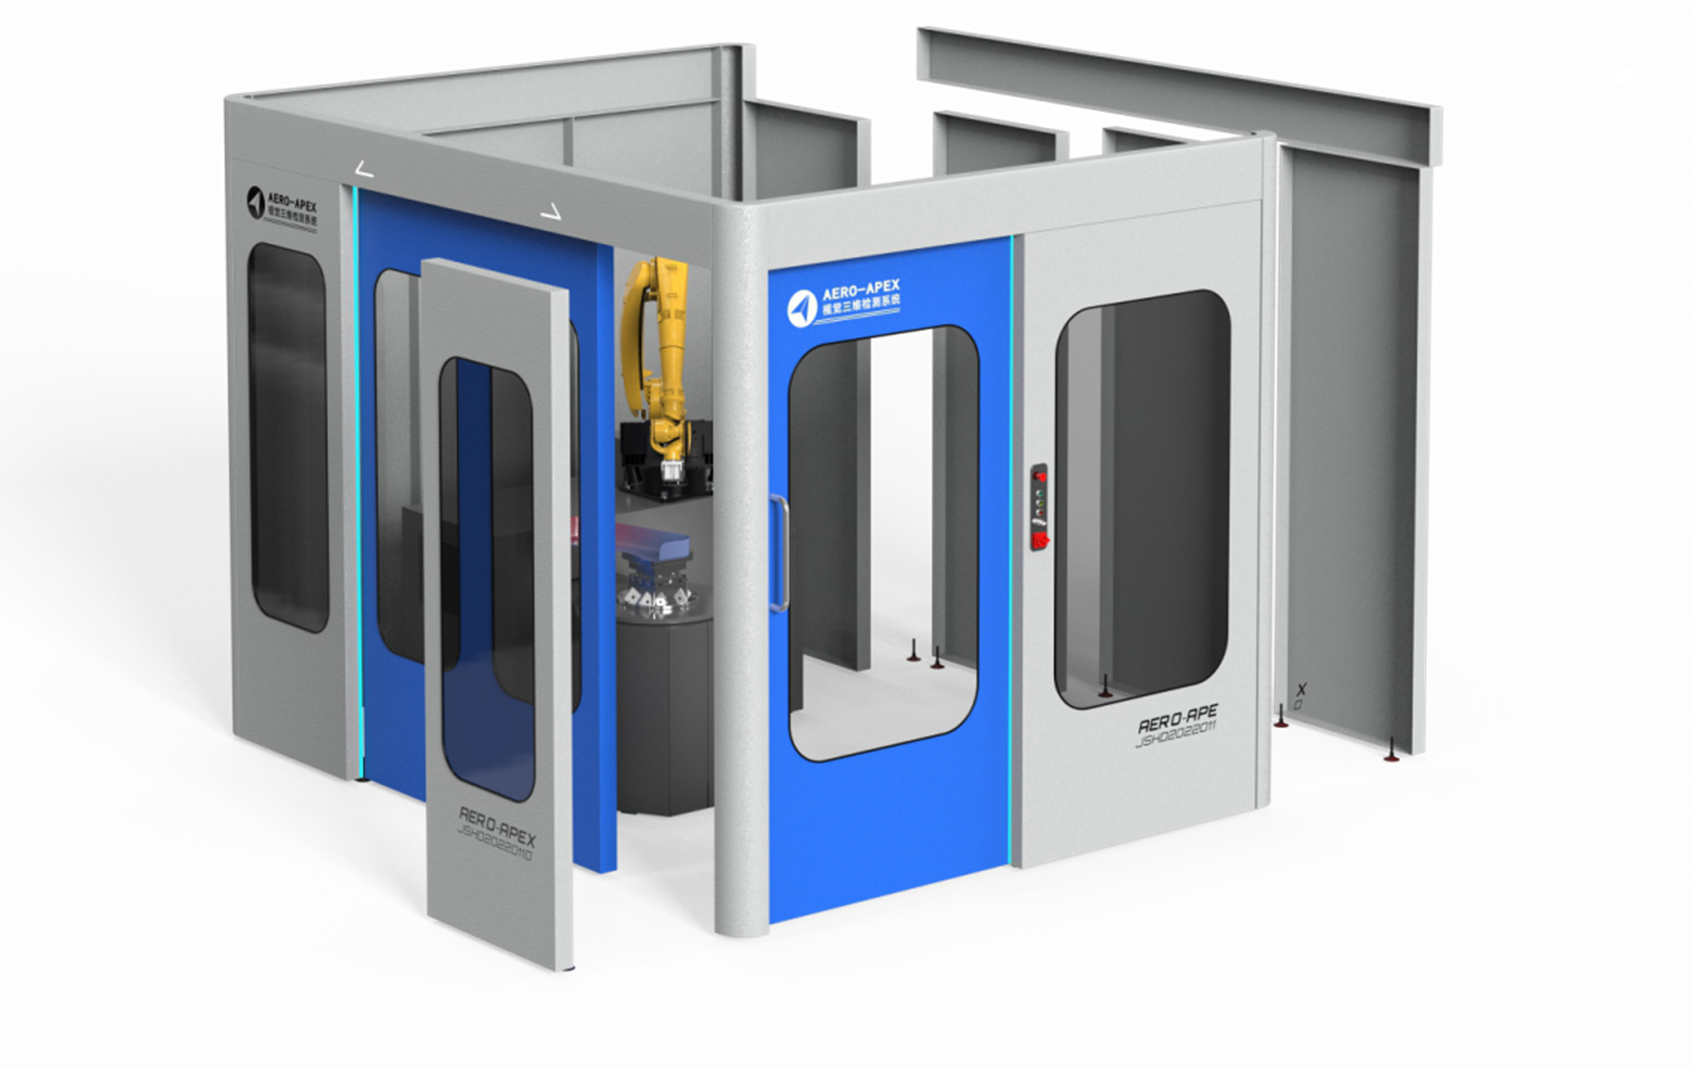
Hangding Intelligent's 3D blue light automatic scanning system replaces manual work with robots. It can plan scanning paths for products, complete measurement of all shapes and sizes, and automatically perform fully automatic 3D scanning and inspection work. The scanning process does not require marker points, and can automatically stitch together to generate error color maps and analysis reports, greatly improving measurement efficiency and reducing manual and management costs.
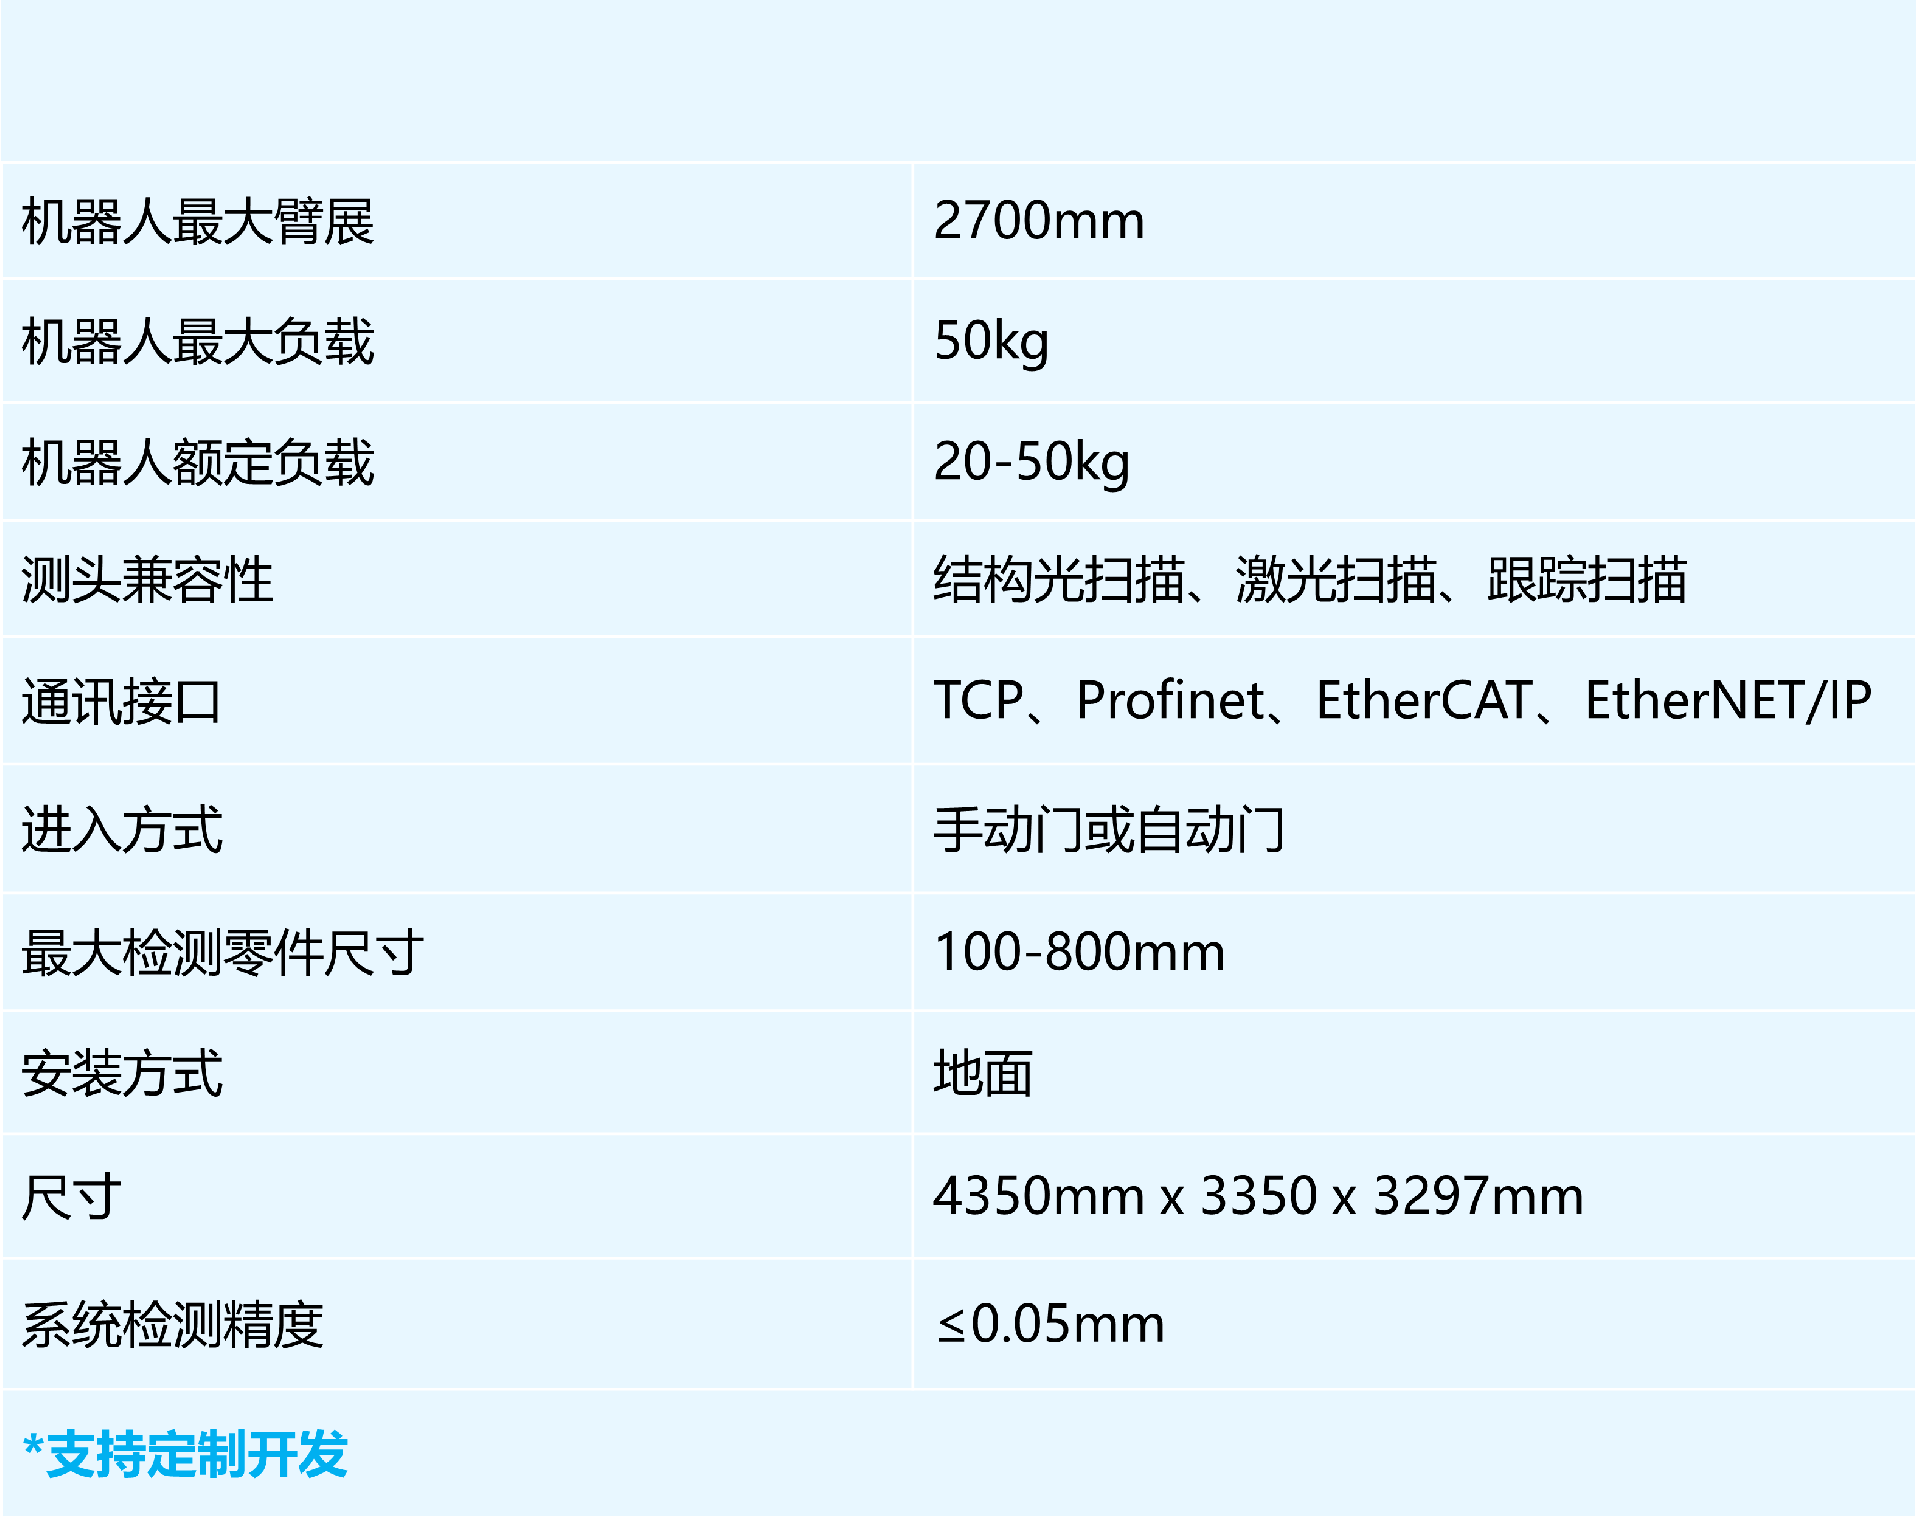
Product parameters
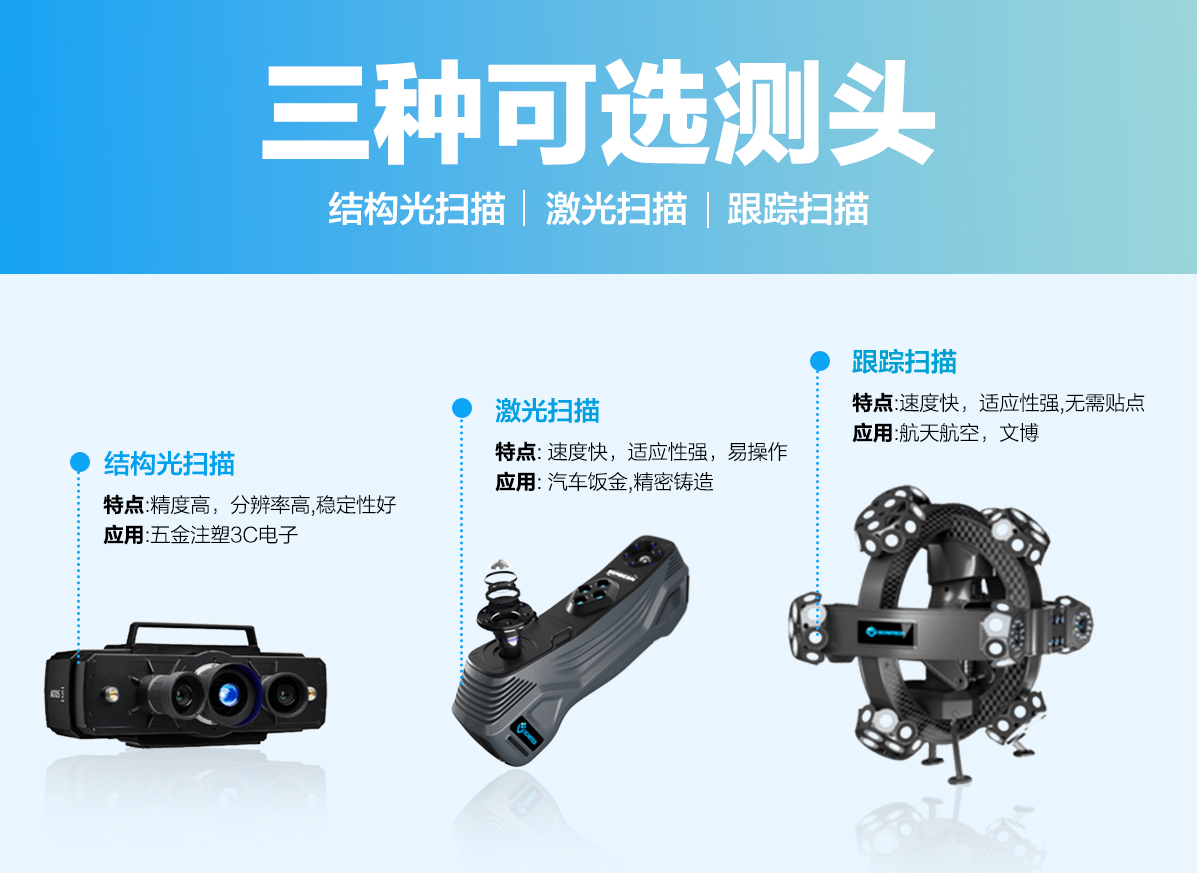
Product features and advantages
Fully automatic non-contact scanning
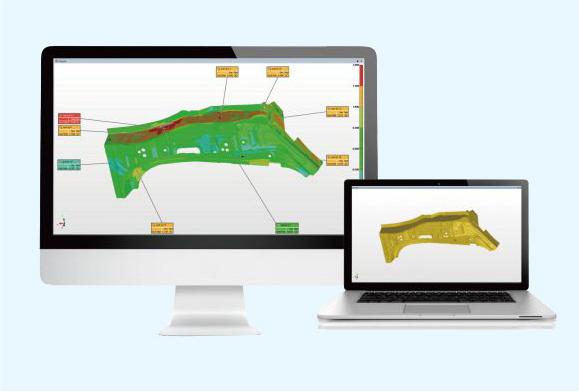
Automatically complete fully automatic 3D scanning and inspection work, automatically plan scanning paths, the scanning process does not require marker points, fully automatic stitching, generate error color maps and analysis reports, and complete with one click.
Integrated design
Integrating robots, turntables, guide rails, 3D scanners, and virtual simulation software, the complete system control unit achieves automated 3D inspection process integration.
Blue light scanning technology
The 3D online inspection system adopts blue light 3D scanning technology, which can effectively prevent metal reflection and improve scanning quality.
Virtual simulation software
Virtual simulation software provides offline simulation functionality for detection, helping customers plan detection positions in virtual scenes, generate robot motion paths, achieve robot collision detection, avoid the risk of manual online teaching, and reduce equipment operating costs.
High data accuracy
The accuracy is as high as 0.025mm, with strong resistance to environmental interference.
Inspection software
Hangding scanning software integrates scanning and inspection comparison functions, greatly simplifying the workflow of scanning, inspection, and report generation, providing users with efficient and fast solutions. 3D scanning generated data can be used in fields such as rapid prototyping, reverse engineering, inspection comparison, and 3D visualization.
Application industries
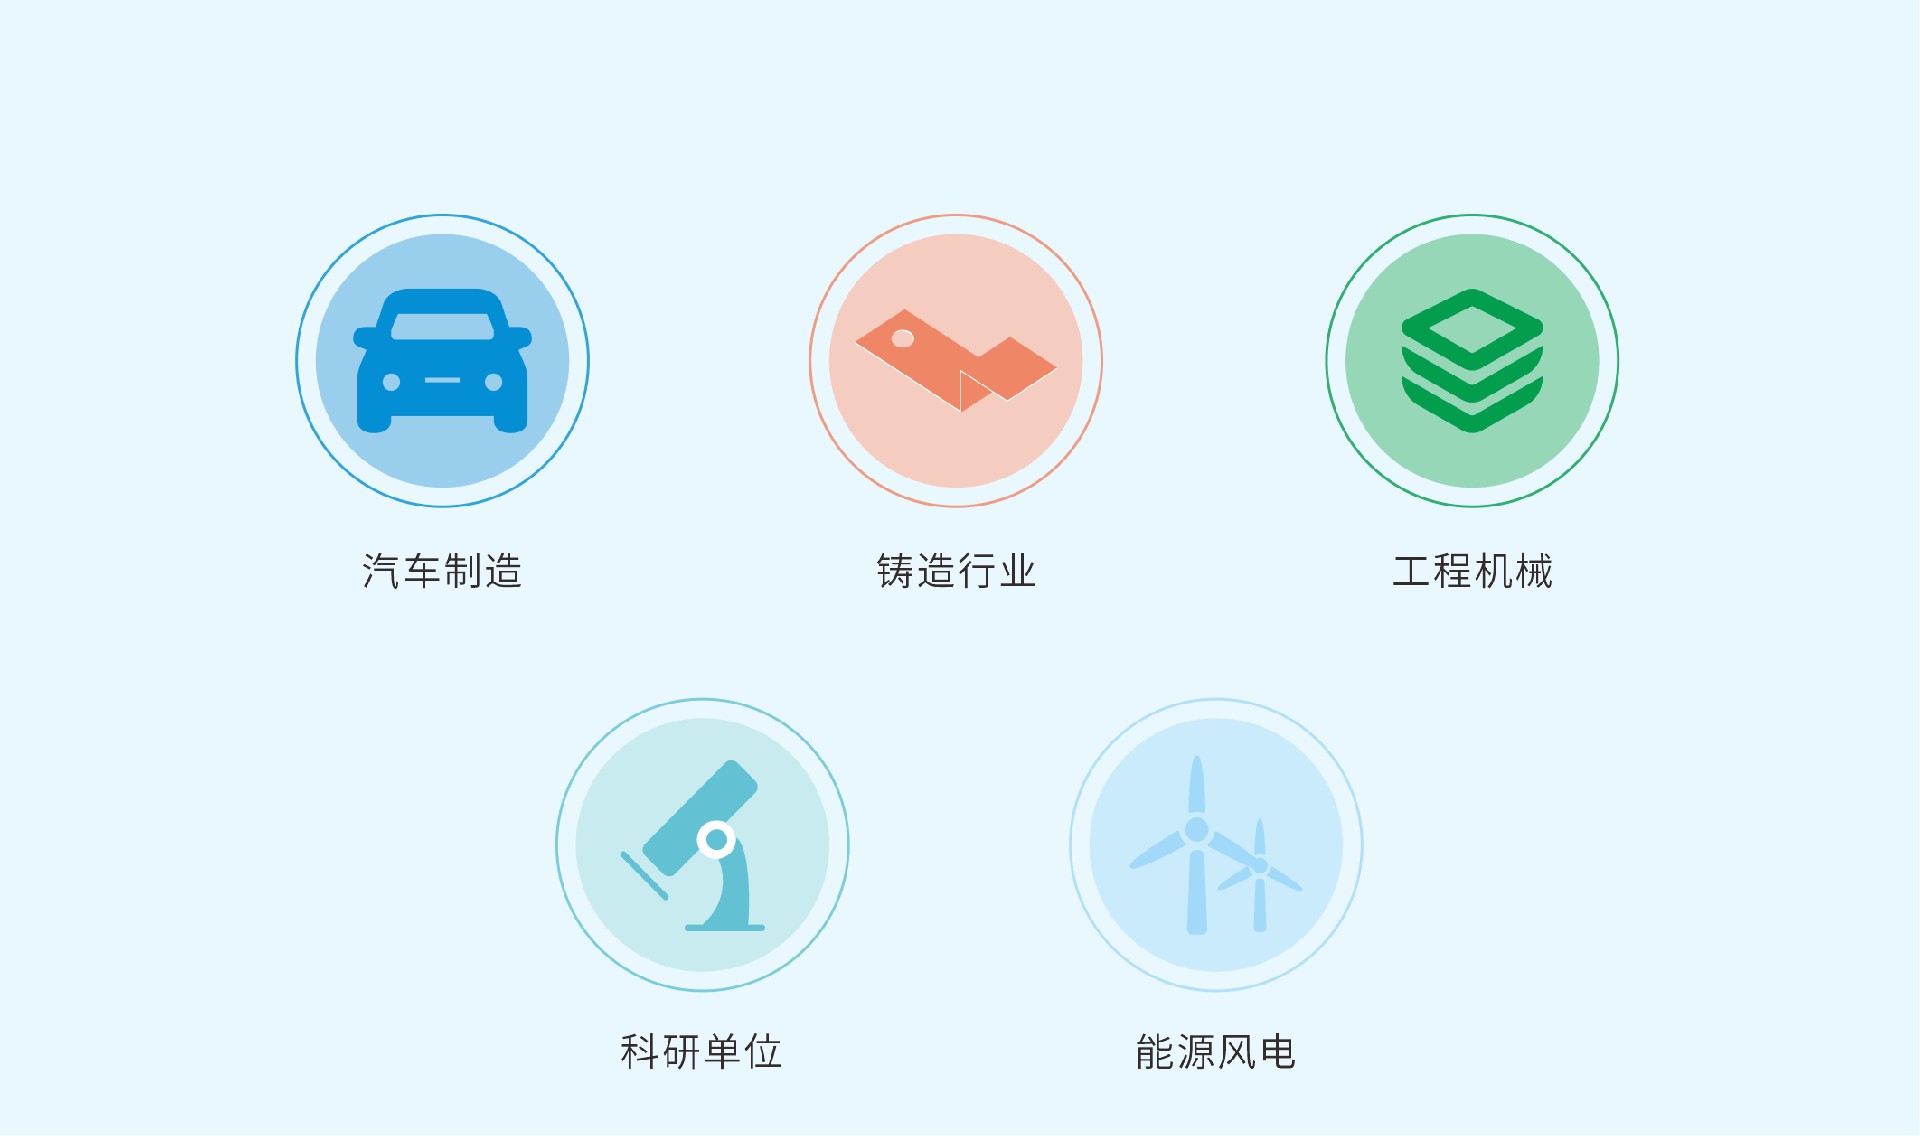
Automobile manufacturing
The robot 3D vision inspection system can be used to detect the size and shape of components such as car bodies, wheels, and engines, ensuring that they conform to design requirements and quality control standards. Additionally, the system can be used to identify and inspect parts on the production line, enabling automated production.
Foundry industry
The Foundry industry involves the production of a large number of molds and castings. The robot vision 3D inspection system can perform fast and accurate inspections of these molds and castings, detect and eliminate non-conforming products in a timely manner, and improve product quality and production efficiency.
Construction machinery
Inspect the dimensions and shapes of various components of large equipment such as excavators, loaders, and cranes to ensure they conform to design requirements and safety standards. At the same time, the system can also be used for equipment maintenance and repair, and potential problems can be identified and repaired in a timely manner through reverse modeling of maintenance and repair parts.
Research institutes
To conduct high-precision measurements and research on various materials and devices, such as detailed analysis of material surface topography and roughness, providing reliable data support for scientific research.
Energy and wind power
It can be used to detect the surface quality, size, and shape of wind turbine blades, as well as the maintenance and overhaul of user equipment, ensuring that they meet design requirements and safety standards.
 PRODUCT CENTER
 SOLUTIONS
 SERVICE AND SUPPORT
 GROUP INFORMATION